Select and export datasources from Datamesh
- In this tutorial, you will use the Datamesh UI to:
Use the Datamesh to select an area of interest
Search for other data that overlaps with the area of interest
Create a workspace with some interesting datasources that overlaps
Export the workspace as a bundle to be used in a gives
To start, you should be logged in to the Datamesh UI at https://ui.datamesh.oceanum.io . Navigate the map so that New Zealand’s North Island is in the map view. We are interested in a Marine park area in the North Island of New Zealand.
Step 1
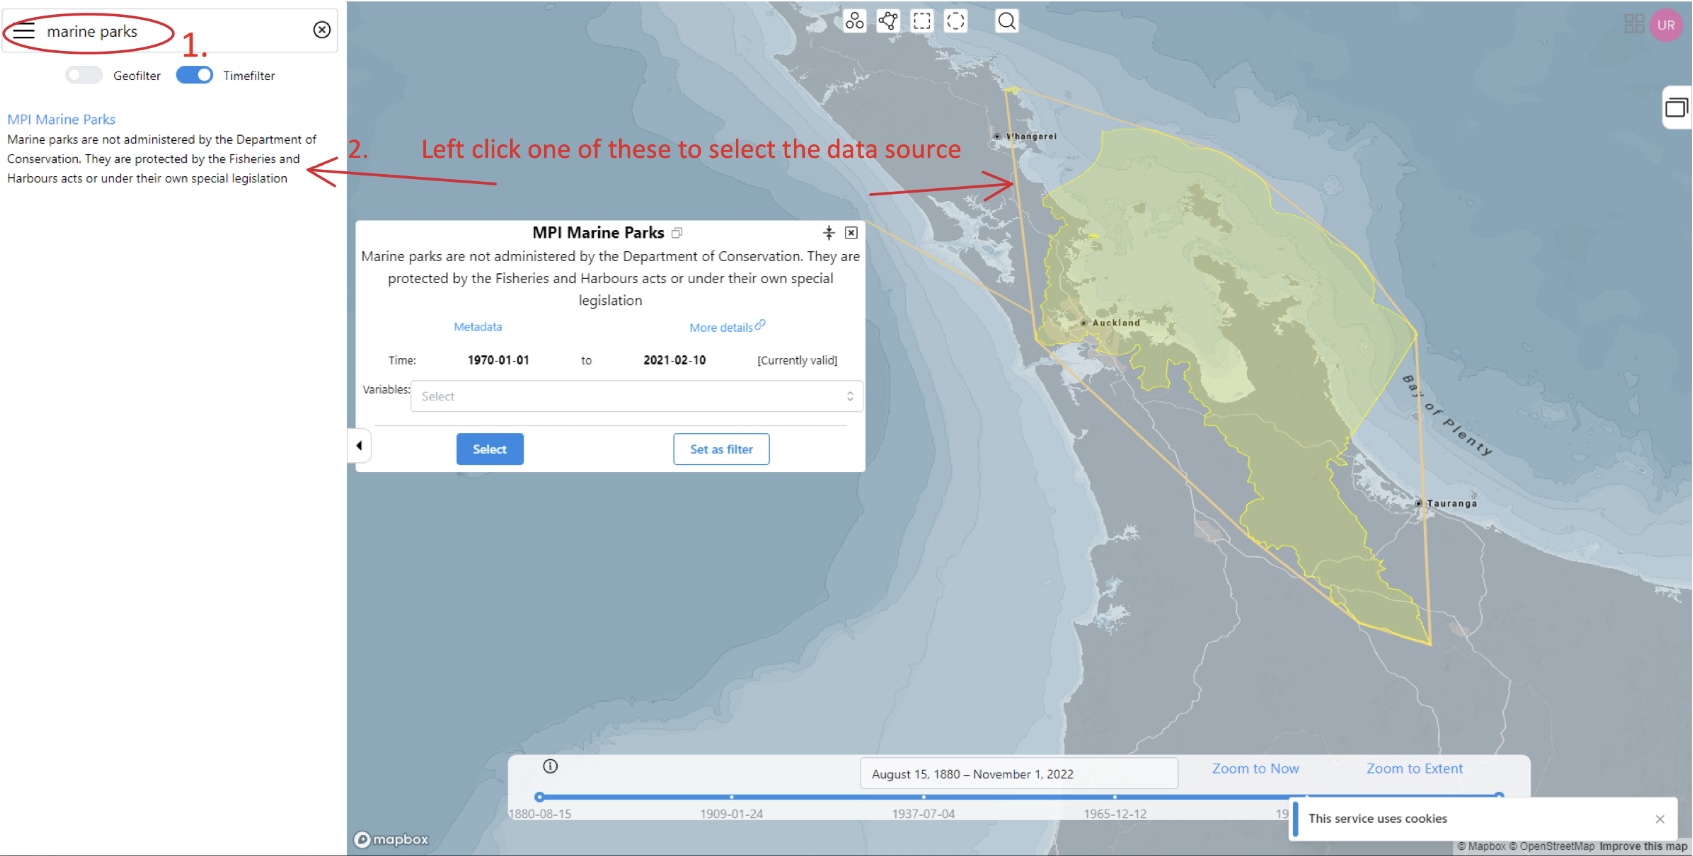
Start by searching for “Marine Parks” in the search bar. You should see a datasource appear on the map.
Select MPI Marine Parks by clicking on the result in the searh drop down, the map label or the map outline.
Step 2
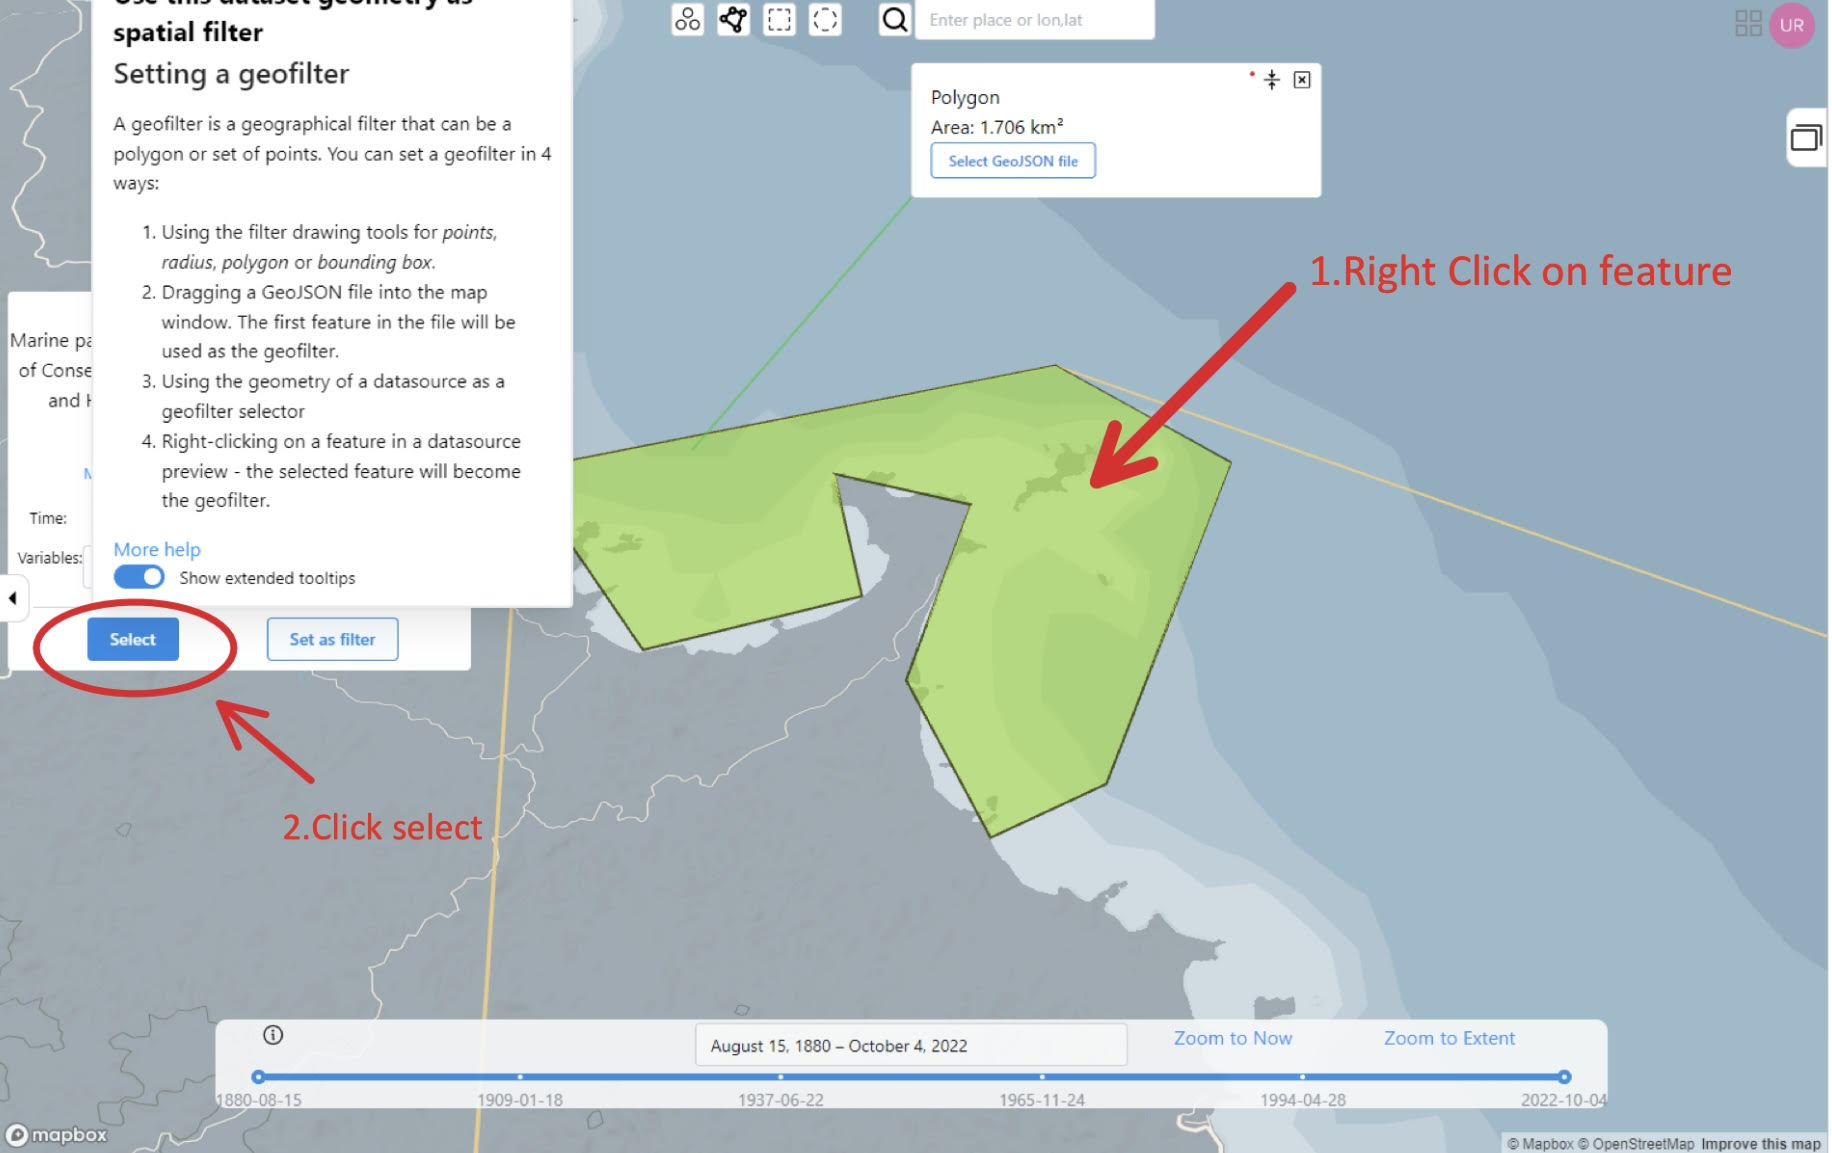
The MPI Marine park Datasource panel should open and two feature areas will appear on the map. Zoom to the smaller northern region.
Right click on the feature to set it as the geofilter
We want to include the area of interest in the workspace, so click to “Select Filtered” the area from the MPI Marine park datasource to the workspace. You should see a “1” appear on the Workspace button.
Step 3
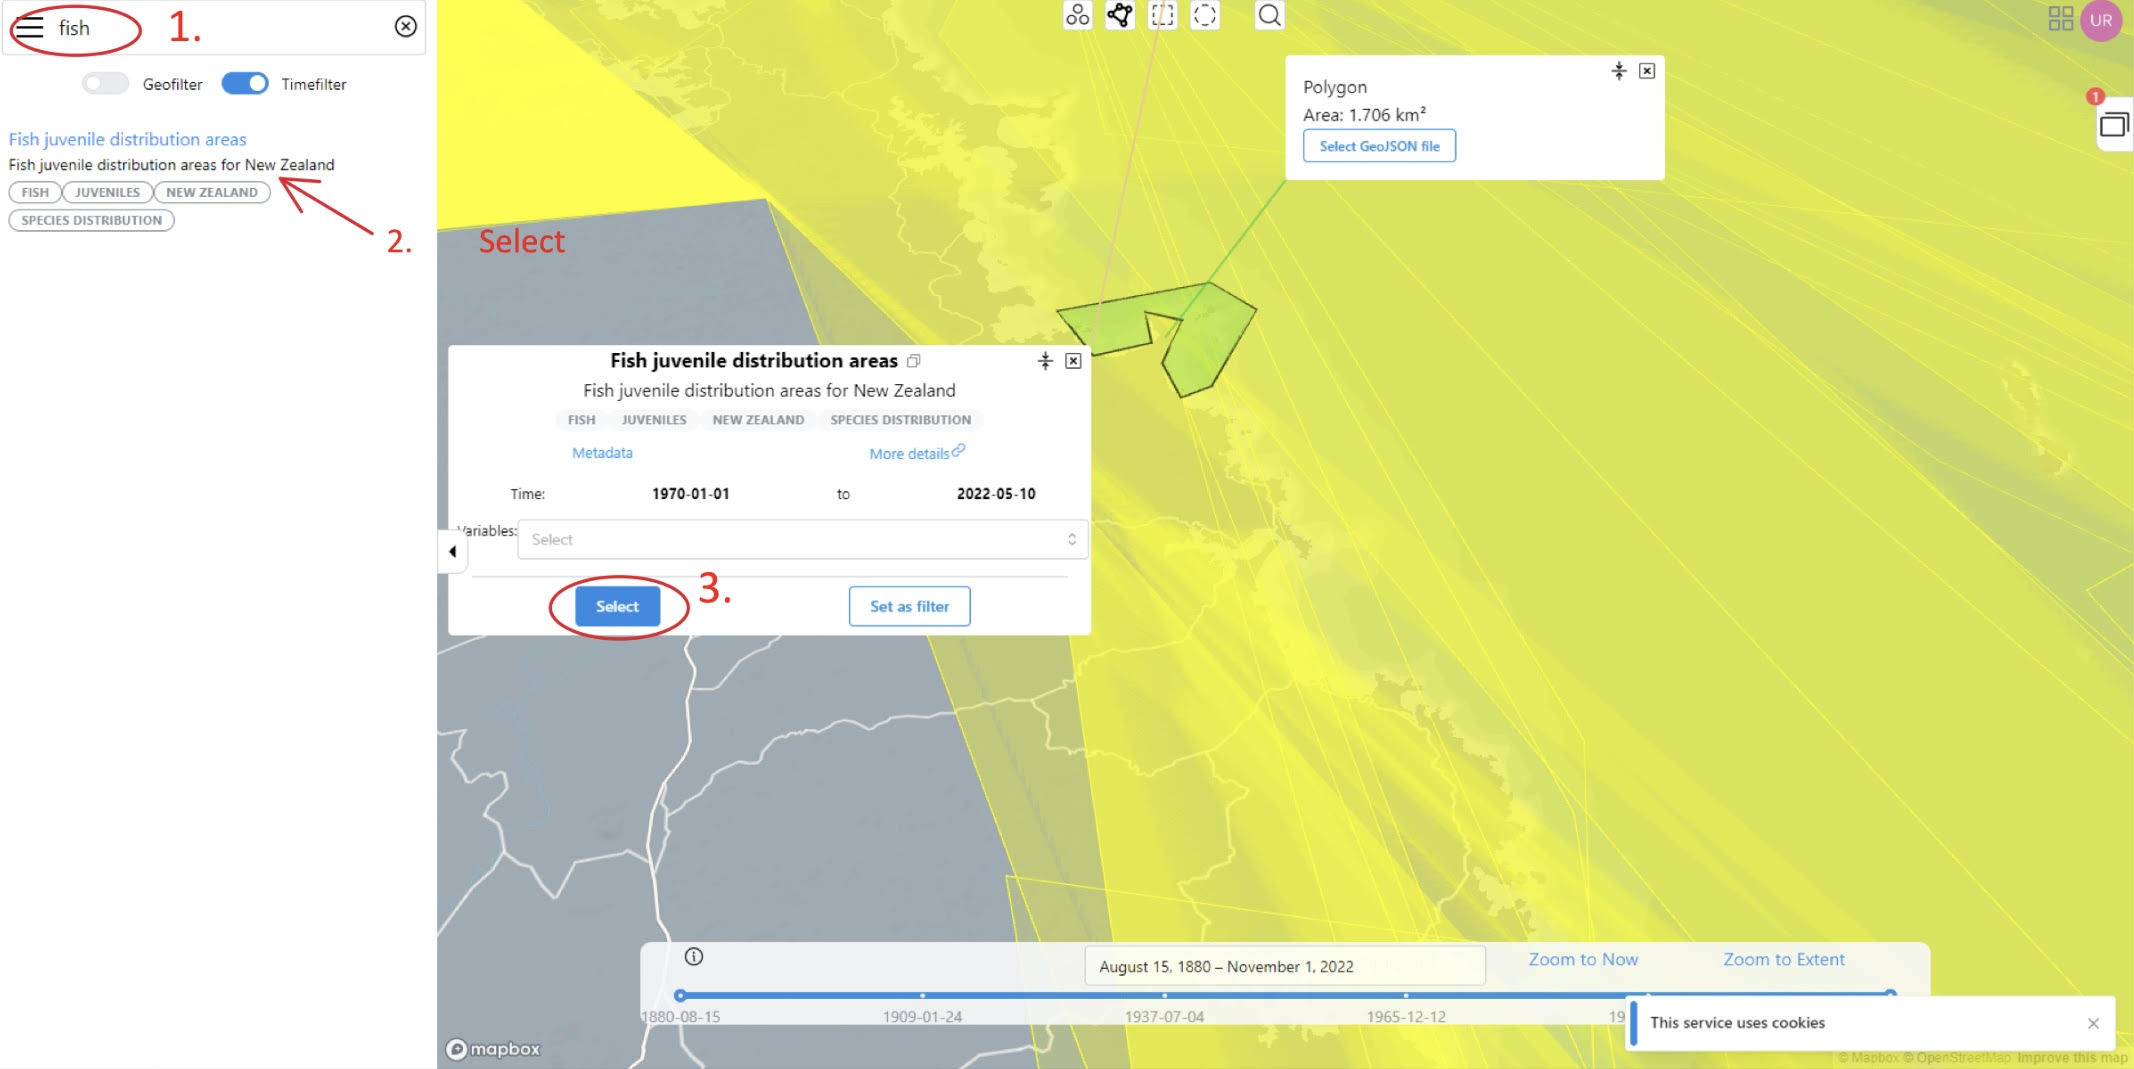
Now lets search for some other relevant data. Since it is a Marine park, lets see if there is any fish data in this area. Type “fish” in the search bar.
You should see several datasources appear. Select Fish juvenile distribution areas.
In the datasource panel, click “Select filtered” to select data from the datasource which overlaps with the geaofilter. This should add a second datasource to the workspace.
Step 4
Let’s browse for some other data that could be interesting. Type “*” in the search bar - this will select everything that intersects the geofilter and will show their extents on the map.
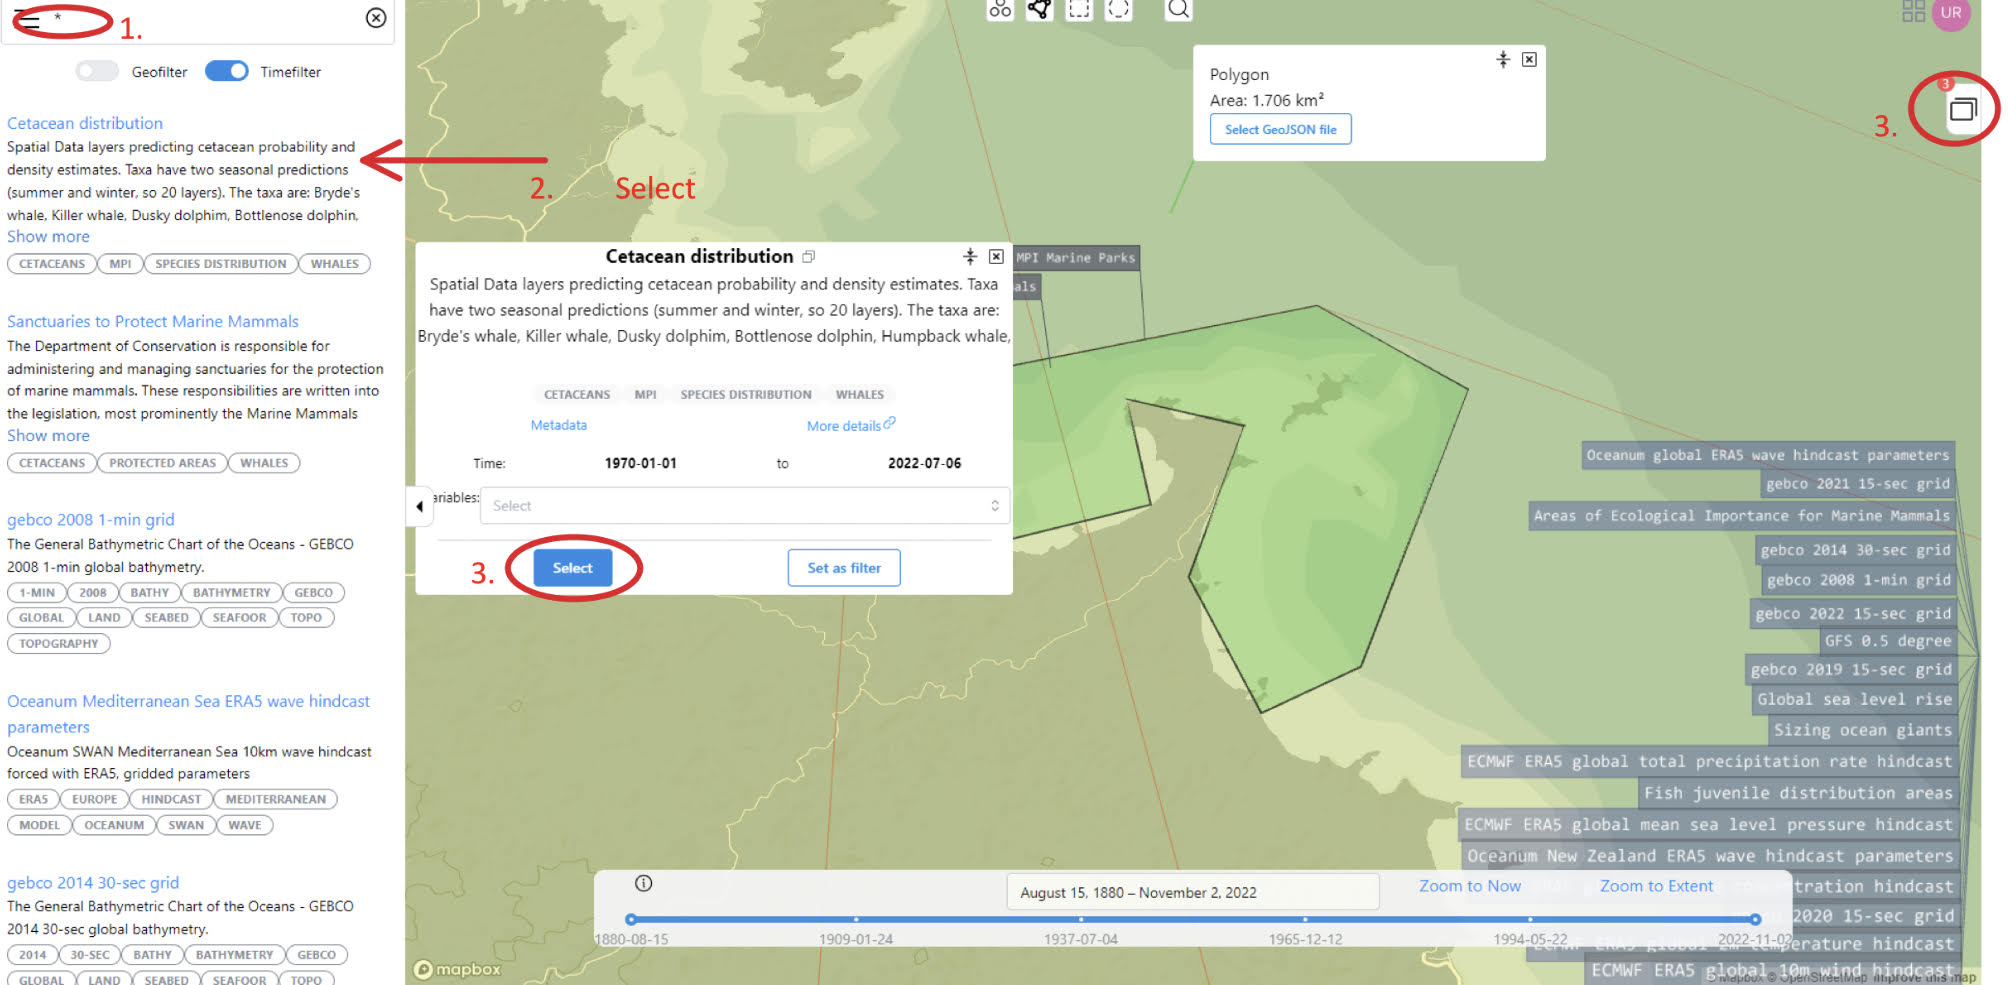
Everyone likes whales, so select ‘Cetacean distribution’ to open that datasource. This is a large raster dataset.
We only want the section of the datasource that overlaps our area of interest, so click “Select filtered” to add a subset to the workspace.
Now open the Workspace View by clicking on the Workspace button.
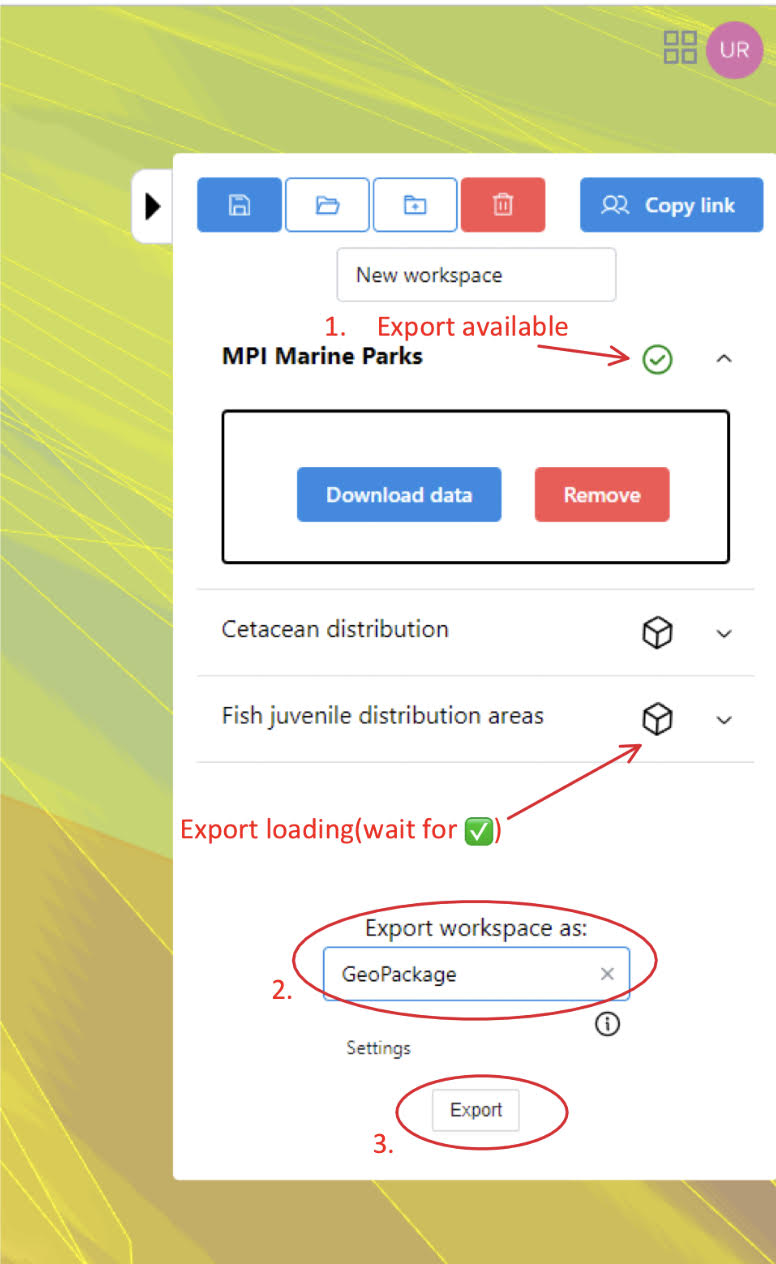
Step 5
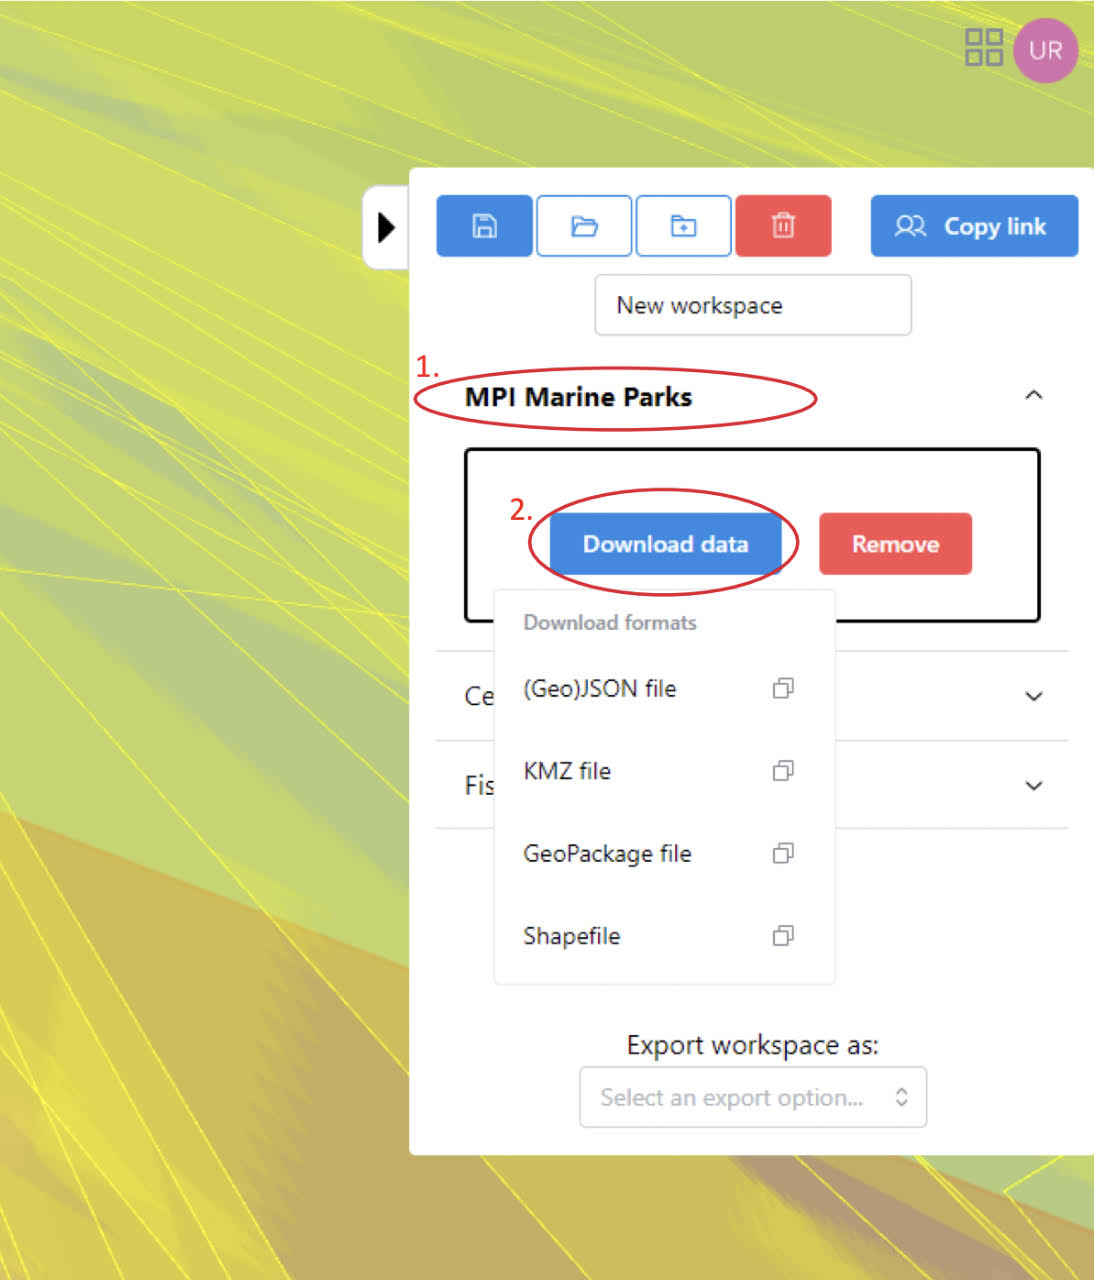
In the Workspace View you can open individual datasources. You can click on “Download data” to download in choice of output formats.
You can remove datasources from the workspace with the “Remove” button.
Step 6
Now lets export the workspace to view in a GIS platform. Choose the “GeoPackage” option.
If a datasource can be exported into the chosen bundle, a tick will show. Not all datasources can be exported into all bundles.
Finally, click “Export” to export the GeoPackage bundle. After a short time it should download.